 Halloween brings out the creative side in me, especially when it comes to outdoor decorations. If you want to impress neighbors, thrill trick-or-treaters, or just add some spooky fun for your family, turning your yard into a DIY graveyard is a project that’s both doable and affordable. I’ve found that even the simplest grave markers and props can create a spine-tingling effect, especially when combined with dim lighting and creepy touches.
Even if you haven’t tried big DIY yard displays before, building a Halloween yard cemetery is surprisingly approachable. I like breaking it into smaller steps, so you can create an outdoor haunt that’s scary, stylish, and totally your own. You don’t need to be a professional crafter, and you won’t need expensive supplies to pull off an eye-catching Halloween display that will have folks stopping to admire your spooky setup.
Picture Your Haunted Cemetery
Before picking up any supplies or tools, I find it helps to imagine what you want the graveyard to look like. Do you want something vintage, with moss covered headstones and crumbling fences, or are you after a modern, over the top horror vibe with skeletons climbing out of the ground? Having a clear picture in mind makes it easier to plan and stops me from buying supplies I don’t need. Also, consider your space; a small yard can feel spooky with just a few key props, while a larger yard lets you go even bigger with your Halloween yard cemetery ideas. If you’re not sure where to start, browse some spooky inspiration boards online, or take a walk in your neighborhood to spot ideas others have used.
Yard Questions to Think About
- How much space do I have for props, paths, and lighting?
- What items can stay outside, even in rain and wind?
- Will everyone need to walk on grass, sidewalks, or a mix of both?
- Do I want the graveyard for just Halloween night or the whole month?
Deciding on these points first means I get better results and waste fewer materials. I usually sketch a loose layout on paper to map out where large props, pathways, and lighting should go—this saves time setting things up and keeps the project organized.
Gather DIY Graveyard Supplies
Basic cemetery props aren’t expensive or hard to find. Whenever I do this project, my main items include:
- Foam boards or insulation sheets (for tombstones)
- Utility knife, black sharpie, and paint (gray, black, and white)
- Wooden stakes or metal garden stakes
- Duct tape or waterproof glue
- Plastic skeleton parts or bones
- Old sheets, cheesecloth, or burlap
- Fake moss, dollarstore chains, and plastic spiders
- Floodlights, string lights, or spotlights
It’s easy to get creative with things you already have lying around. Old garden tools, broken planters, or damaged furniture can turn into spooky props. If you want inspiration or want to buy some readymade pieces, visit my guide to Spooky & Stylish: Best Outdoor Halloween Decorations For 2025, where I share ideas for tombstones, skeletons, and fog machines. Thrift shops and dollar stores are surprising sources for bits and pieces that add character to your display. Don’t forget to check your attic or garage—you never know what you’ll stumble upon!
Make Realistic Tombstones
I always start my homemade graveyard by making several tombstones. The classic look is gray foam or cardboard shapes with funny or creepy names written on them. Here’s how I make them:
- Draw simple shapes (arches, rectangles, or crosses) on foam board and cut them out with a utility knife.
- Paint them with gray paint, then dry-brush with black and white for a weathered look.
- Add names, silly dates, or phrases with a black marker or paint. “I.M. Gone,” “Al B. Back,” and “Noah Scape” are a few of my favorites.
- Attach stakes to the back with glue or tape, then stick them deep in the ground so they won’t blow away.
If you want headstones that last for many Halloweens, waterproof the paint and store them indoors after the season. Buying heavyduty tombstone props can also save time, and I’ve had great luck mixing bought and handmade markers together in my yard. If you want more durability, upgrade to wooden tombstones with layers of weather sealant. The trick is to give every marker a unique touch—add cracks, moss, or painted shadows for extra realism.
Bring the Graveyard to Life
This is my favorite part, making things look creepy and a little unsettling. Here are some ways I build out the scene:
- Scatter bones, hands, or feet near some gravestones to make it look like skeletons are escaping.
- Drape cheesecloth or torn burlap over headstones, then mist with gray or brown spray paint for an aged, ghostly effect.
- Use plastic chains to “lock up” certain graves, or let fake rats scurry by the tombstones.
- Pile up dirt, mulch, or leaves in front of markers to mimic fresh graves.
Adding a broken fence really boosts the haunted atmosphere. You can build one from weathered wood scraps or lightweight PVC pipes painted black. Scatter a few jack o lanterns or LED candles around for a finishing touch. If you want extra movement, tie thread to plastic bats or ghosts and hang them from branches above your graveyard to let the wind make them flutter and swirl. These little additions create a haunted, interactive vibe even when you’re not outside.
Use Spooky Outdoor Halloween Decor With Lighting and Fog
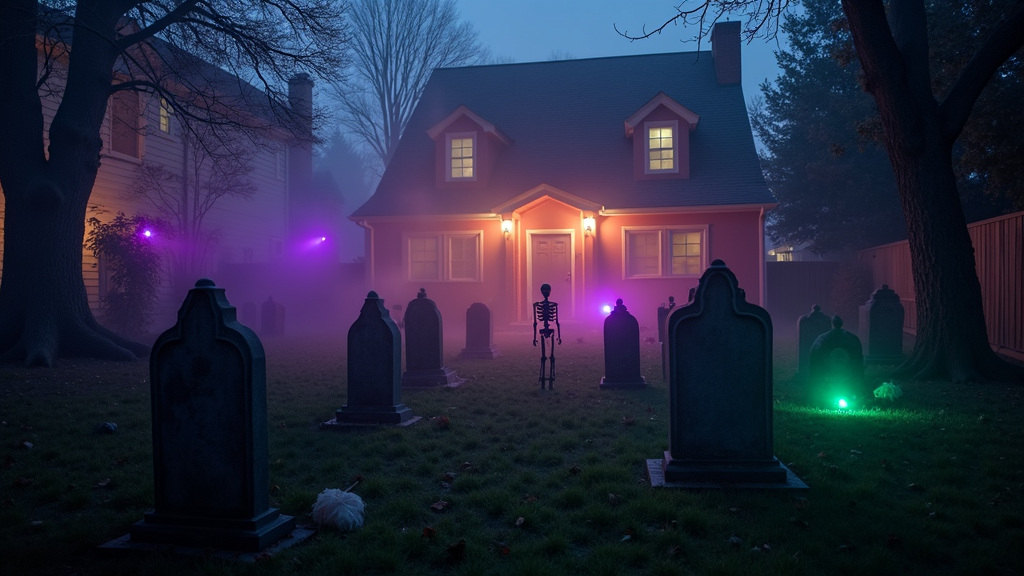
Lighting is super important for any DIY Halloween graveyard. I like using a mix of floodlights and string lights in purple, green, or orange to shine on tombstones and ghostly props at night. Create shadows that make skeletons and markers look extra menacing. A fog machine near the ground can make the whole display mysterious and eerie; just watch where the fog blows, since wind can carry it away fast.
Make sure to aim some lights low across the ground for ground-hugging effects. Hide spotlights behind props to cast tall, creepy shadows. For more creative lighting ideas and ways to give your graveyard a truly haunted atmosphere, check out How To Create A Haunted Patio That Wows The Neighborhood. You’ll find easy tips to upgrade your spooky outdoor Halloween decor and get a genuinely chilling vibe without breaking the bank.
Keep Your DIY Graveyard Safe
With all the excitement and dark lighting, safety might get overlooked. Every year, I make sure pathways are clear and well lit, especially if kids or older adults will be walking through the yard. Keep fake webs off walkways, and secure props so wind can’t knock them over. I always steer clear of sharp materials, real candles, or anything that could catch fire.
- Test walk the area at night to make sure there’s enough light to see steps and edges.
- If you use cords or fog machines, tape down or hide wires to prevent tripping.
A little planning here means your scare factor comes with zero real life scares. Safety always makes the experience more fun for everyone, and you won’t have to stress about accidents.
DIY Graveyard Troubleshooting & Pro Tips
What if I don’t have a big yard?
A porch, front steps, or even a window box can become a tiny haunted cemetery. Use miniature props, a few fake candles, and a small tombstone or two for a cozy but creepy effect. Arrange miniature gravestones in flowerpots or along your steps to get that haunted look on a smaller scale.
My tombstones keep blowing over; any tips?
- Drive stakes at least 8 inches into the ground and tape or glue markers securely.
- Add a brick or heavy rock behind light props for support.
- If possible, place larger tombstones near shrubs or fences to help block wind gusts.
How do I make the graveyard last all month?
Use outdoor safe materials and weatherproof paint. Bring fabric, foam, and lightweight props inside during storms, then set back up in drier weather. Keep a bin handy so you can quickly store fragile props when bad weather is on the horizon. Every week, check your setup to fix anything that has been knocked over by wind or rain, and give a quick refresh as needed.
Your Next Haunted Yard Steps
Creating a DIY Halloween graveyard is one of my favorite outdoor projects. It brings spooky energy to the whole neighborhood and gives me a chance to get creative. If you want to build your own haunted cemetery, start with a vision, gather basic props, and try making a few tombstones by hand. Then keep adding creepy details and lights until you love the effect. Don’t be afraid to try something new each year—whether you dream up a story for your graveyard or add interactive props that jump or light up, there are endless ways to make it your own.
Your DIY Yard Graveyard Checklist
- Choose your favorite graveyard style and plan your yard layout, even if it’s just a basic sketch.
- Gather foam, paint, and props for tombstones and extra details—let your creativity shine.
- Use spooky outdoor Halloween decor like skeletons, fog machines, and dramatic lighting to finish the look.
- Check for safety every night, and enjoy the scare! Make sure lighting is fixed and pathways are clear.
What creepy detail or prop will you add to make your Halloween yard cemetery unique? I would love to hear your ideas and see how your DIY graveyard turns out. Feel free to share your photos and stories! With your creativity, your haunted yard will become a neighborhood favorite.